Showing posts with label kids can do it. Show all posts

Tuesday, March 12, 2013

Recycled Can Pen Holders

It's Spring Break, and this year I thought I'd find some fun things for us to do. Here is the craft the girls did yesterday, along with a friend, recycling cans into pen/pencil holders. Not only did they all enjoy it, but their friend said it was the "funnest craft I've ever done!"


What you need:

- clean cans with labels removed (soup, fruit & vegetables, coffee, etc... the large one in the picture is actually a big hot cocoa container, the kind with cardboard sides & metal bottom/top rim)

- Mod Podge (I prefer the matte finish variety)

- 1" foam brush

- assorted paper - construction paper, typing paper, scrapbook paper, magazine pages, paper candy wrappers, old book pages, whatever kind of paper your child will find creative!

- other flat embellishments such as ribbons, lace, buttons, paper doilies, etc. - again, the sky is the limit, be creative!

- craft scissors

- plastic placemat, plastic tablecloth, or some other way to protect your table from the glue


Here's how we did it:

Cut or tear paper to fit the cans. You can use one piece to wrap the whole way around the can, or you can cover just a part of the can at a time with different papers.

** Note: If you want to write something on your paper, it needs to be done before you glue it to your can, and you need to use colored pencils (pens & markers will smudge & run when they get wet with the Mod Podge)

Paint the back of the paper with Mod Podge, getting glue all the way to the edges of the paper.

Lay the paper on the can where you want it, then gently smooth it to remove any air bubbles. If an edge or corner does not lay down, add more Mod Podge underneath.

Cut or tear smaller pieces of paper into shapes, strips, or whatever you'd like to add as embellishments on top of the first paper layer.

Paint embellishments with Mod Podge in the same way, and stick on.

Repeat this process for any ribbons, lace, candy wrappers, and so forth. Three dimensional embellishments such as buttons can be added after all the other items are added.

Paint over all of your artwork with a generous coating of Mod Podge, to seal and finish. Don't worry, it will dry clear!


This is a house of girls, so our cans turned out mostly feminine. However, boys would love this craft too, using magazine pages & colored papers to their tastes, perhaps with twine, shoelaces, candy wrappers... what can they find that is flat and can be glued?

Saturday, January 7, 2012

hoping and waiting

Every year we hope to see snow, but we can never be certain
that it will make an appearance on our winter stage.

So we decided to take matters into our own hands and make our own.

Knowing snowflakes have 6 sides, I have always had a nagging issue in the back of my mind with the standard eight-sided folded snowflake. However, recently I found this pattern for creating 6-sided snowflakes in an old kid's arts & crafts book:


snowflake fold


It takes practice (especially for the kids - lots of assistance was needed), but once you get the hang of it, it's pretty easy. Plus, you'll have the satisfaction of knowing you have created scientifically correct, six-sided flakes.


window of snowflakes


We filled up this window, as well as another the same size. There were tons of tiny paper clippings all over the table and floor when we were finished! Once we had it all cleaned up, this project took up a whole afternoon - yay!

Final tip: iron the opened up flakes on a low setting to flatten them out before hanging.

Have fun!

Thursday, September 17, 2009

reading + food = delicious learning!

The latest book study Claire & I are doing for school (through Five In A Row vol.1) is

How to Make an Apple Pie and See the World
by Marjorie Priceman


There's a lot of great lessons for these FIAR book studies, including lessons in language arts, math, geography, history, science, and art. Of course, our favorite part, though, is when the lesson includes something involving food!


Speedy Streusel Pie

(you can use a refrigerated pie crust from the store, but they're so easy & inexpensive to make at home, and baking is such a fun project for kids)

Crust:
1 1/3 c. flour
1/2 tsp. salt
1 Tbsp. sugar
1/2 c. shortening
3-4 Tbsp. cold water

Mix dry ingredients in a bowl. Add shortening, cut it in using a pastry blender or two forks, until you have pieces the size of dry oats. Add the water & mix until well blended.

You can roll it out the old fashioned way, or I just like to put the crust ball in the pie plate, spread it out and up the sides using my fingers, and use the back of a big spoon to smooth it out.

crust


Streusel Topping:
1/4 c. flour
1/4 c. brown sugar
3 Tbsp. butter/margarine
1/2 c. chopped nuts (I don't use these, it's still good without the nuts)

Mix flour & sugar in a small bowl. Cut in the butter with a pastry blender or two forks. Set aside.


Filling:
5 baking apples (2 lb.)
2 tsp. lemon juice
1 tsp. vanilla
1/4 c. sugar
1 tsp. cinnamon
3 Tbsp. cornstarch

Peel, core & slice the apples. I use one of these - a worthy investment, as I make more apple things since I got it & even use it for potatoes.

Toss the lemon juice and vanilla with the apples in a big bowl. Mix the sugar, cinnamon & cornstarch in a small bowl, then add to apples & toss to coat.

apples


Add apples into the crust, spread them out evenly. I like to pull the edges of the pie crust inward (like a crostada), it keeps juices from spilling over the edge during baking.

Start this pie out in the microwave! Really! It cuts the baking time by 2/3, but the pie still turns out fabulously!

micro

Put it in the microwave, for 8 minutes (if your microwave doesn't have a rotating glass plate that turns the food during cooking, then you need to turn the pie yourself after 4 minutes.)

While the microwave is running, preheat the oven to 400°.

When the 8 minutes in the microwave is up, immediately move the pie to the oven (use oven mitts!) for 18-22 minutes.

finished


Served warm, this pie is a delight... but anytime is a good time for apple pie!


slice

Thursday, May 14, 2009

A Pair of Red Clogs


I used Five in a Row for supplemental teaching for kindergarten & 1st grade with Nicole, and I'm doing the same now for Claire. If you want to read more about it, you can go here.

We just used
A Pair of Red Clogs by Masako Matsuno for our latest FIAR study. It's the story of a Japanese girl who learns about honesty and taking care of what belongs to her.

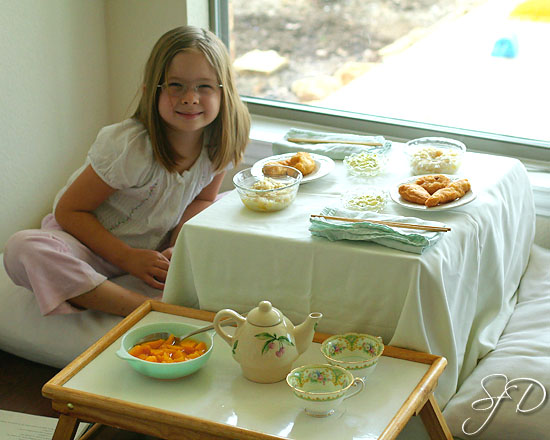
I decided to recreate this scene from the book for a fun dinner on an evening when Claire & I were home for dinner by ourselves:


First let me say, I am not going to serve fish with the eyeballs and tail still intact.

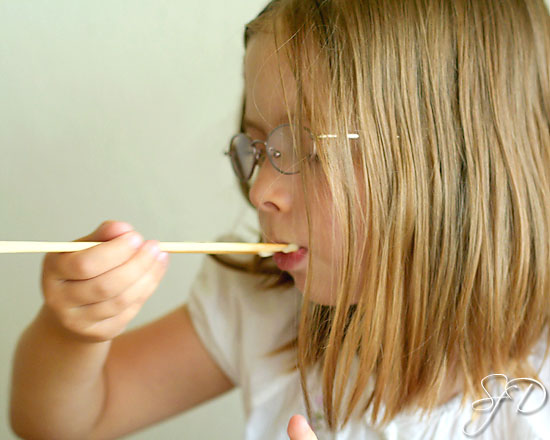
Second, I basically did what I could with what I had, so this is in no way intended to be an authentic Japanese meal. We had fish fillets, rice, tartar sauce, green tea, and peaches - yes, mostly American, I know, but we both did use chopsticks and sit on pillows on the floor!