Showing posts with label creating. Show all posts

Thursday, May 16, 2013

DIY: polo shirt --> halter top

My younger daughter joined a choir this past fall, and just after buying all of her uniform pieces, they had to close. All members were invited to join another choir, which worked out wonderfully, but I was stuck with a few brand new obsolete clothing pieces.

The piece in question for this tutorial was a red polo shirt embroidered with the choir logo, which I recycled into a summery halter top.

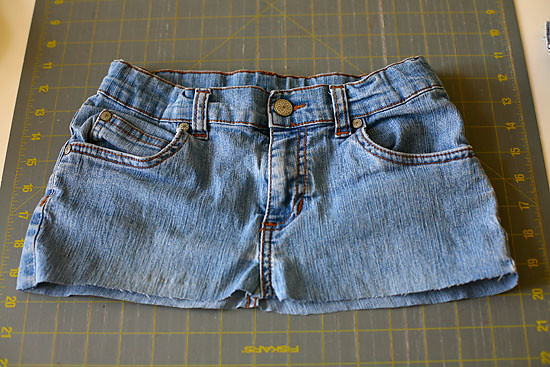
The bottom edges were basically equal in length, so I didn't have to alter the hemline.


Here's a closer shot to see the cutting lines. I cut more sparingly at first, and then tweaked it until it looked about right.


8. Finish by sewing closed 30-36" length of 12" double fold bias tape & thrad through the top edge casing. I happened to have red bias tape with white polka dots, which added a cute touch.


I did a similar upcycle with a pink strawberry long sleeved top. It had holes in the arms, so I cut those off & turned the fabric from the arms into finger-formed ruffles for the chest embellishment.


You could do this top in any size, adult or infant or anything in between.

Obviously, the bias tape length would need to be adjusted for the size.


Monday, March 25, 2013

Resurrection Mantle

I finished my Resurrection/Easter mantle decorating today. I did a quick and easy bunting project that added just the right finishing touch, and I'm very pleased with how it all turned out.


Here's a quick rundown on the bunting craft...
Supplies:
- muslin or other basic solid fabric
- jute cord
- black craft paint (I actually used leftover chalkboard paint!)
- printout of the letters H, E, I, S, R & N, in a font you like (I used Lemon Chicken sized at 175 in MSWord)


Tear the muslin into a couple of 6" wide strips, then tear those into 4" wide pieces, to get 9 total flags. I wanted the rough look, but if you want a clean look for whatever fabric you are using, cut nine 6x4" rectangles.

Iron the flags and sew or glue down (with fabric glue) a 1/2" casing at the top of each one.

Cut out the letters from the paper they are printed on to make stencils. I did have to cut in from the sides on some of them to reach the odd angles, so I just taped the outlines back together.

Center each stencil on the flag, and gently paint with the black paint. I used a Q-tip as my paintbrush, it allowed me to tap gently and get the soft, mottled look I wanted. It's better to start light, then add more to build the color until you like the amount, instead of doing too much and having it leak or make dark blobs.

Put a safety pin on one end of the jute (measured & cut to fit the space where you want to hang). Use the safety pin to push the jute through the flags in order.

Hang, adjust the spacing of the flags, done!


I am deeply thankful for the reminder I need and receive every year on Resurrection weekend, of God's faithfulness, Jesus' sacrifice, and the Spirit's renewal.

Tutorial for the crown of thorns is here, and the empty tomb tutorial is here.

Thursday, March 7, 2013

crown of thorns

A few years back, I became disenchanted with Easter and the traditions that often go with it.

My kids, interestingly enough, had never really cared about egg hunts.

When we tried to color Easter eggs, they didn't really like it and would disappear soon after we had started, leaving me with most of the work.

And as cute as they are, this is not really what Easter is all about...


What truly bothered me was when I was introduced to the pagan origins of Easter itself. Consider searching this out and reading about it, if you are interested. I had always wondered why baby animals and flowers were associated with this holiday, and now that I knew why, I couldn't bring myself to get into it anymore.


The holiday that I really cared about, I realized, was holy day of Resurrection.


Finding ways to incorporate the death and resurrection of Christ during what is the Jewish season of Passover seemed far more relevent to our family life. So I threw out my bunny decorations and began seeking out ideas to unite our activities around the Resurrection. Let me tell you, my kids didn't miss the old Easter stuff at all, they didn't even ask about it.

Last year, I read an article about this very topic, which suggested decorating your home's mantle with items pointing to the Resurrection, much like setting out a nativity scene. I went on a hunt for such items, only to find very little.


I have been collecting and making things here and there since last year, though, and this year I feel I have come up with a good collection. Here are a few ideas for you:

palm branches
donkey figure
cross
plaque or sign with a message about the Resurrection
wooden goblet (for the Last Supper)
empty tomb figurine (tutorial for mine, shown in the mantle shot above, coming soon!)
crown of thorns


I made this crown from branches cut from a very scary looking wild bush we have here in Texas. I have no idea what it's called, probably because it is not often used in landscaping! My brave husband went on a hike with my kids and brought back a bunch of branches for me to use.


I soaked them in a bathtub full of water for a couple of days to soften the wood. Last night, I got to work, forming them into a wreath.


I had planned to take more photos as I went along, but this process proved to be very prickly, as I suppose should be expected. I have several painful scratches today on my hands. It was rather sobering, actually, thinking about how this is nothing compared to what Christ endured.

If you want to dare to try this yourself, I used the weaving techniques used for making a grapevine wreath. You can find basic directions for this here. I did some trimming when I was done with the shaping to remove excess buds and tiny branches.


Let me challenge you to find some new ways to focus on the Resurrection this year. There are a lot of creative ways out there to do this, they are just not as easy to find as hollow plastic eggs at the grocery store. But I promise it is far more satisfying than giving your kids a basket of pastel candies (which we still do, by the way!)

Monday, November 19, 2012

Make It Yourself - photo/card hanger


You can use an old window frame (minus the glass) like I did, or you could also use any empty photo frame of any size, painted whatever color you'd like!

other supplies:
- metal screw eyes, I used , you can use fewer or more
- jute cording
- hammer & nail slightly smaller than the width of the thread of the screw eyes
- 1 3/4" craft clothes pins

Turn the frame around, back side facing you, and lean it against a wall or other support.

Using the hammer & nail, tap pilot holes at random intervals into the side of the frame. I put the pilot holes in the part behind where the glass would have rested, so that the screw eyes are partly hidden from view. (When screwed in, the screw eyes will be parallel to the wall and the frame - hope this makes sense!)

Turn frame so the other side is down, repeat pilot hole process, spacing these holes so they are staggered between the holes you just created on the opposite side.

Insert the eyes into the holes and screw in. I used blunt-nose pliers some of the time when there was resistance in the wood, otherwise my fingers would have been sore!

Begin threading the jute cording back and forth through the eyes, starting at the top or bottom, until you have created a zigzag pattern across the whole frame.

Tie the jute with a secure knot around the last screw eye. Starting at this end, begin gently tightening the jute from one eye to the next. You don't want it to sag when you attach things! When you reach the other end, secure it with another knot around the last screw eye. Trim the jute by both knotted ends to 1-2" long.

Use clothes pins to clip items to the jute. Use it year round by clipping seasonal items on for added fun!

Stand the frame on a piece of furniture against the wall for display, or hang on the wall.


Saturday, January 7, 2012

hoping and waiting

Every year we hope to see snow, but we can never be certain
that it will make an appearance on our winter stage.

So we decided to take matters into our own hands and make our own.

Knowing snowflakes have 6 sides, I have always had a nagging issue in the back of my mind with the standard eight-sided folded snowflake. However, recently I found this pattern for creating 6-sided snowflakes in an old kid's arts & crafts book:


snowflake fold


It takes practice (especially for the kids - lots of assistance was needed), but once you get the hang of it, it's pretty easy. Plus, you'll have the satisfaction of knowing you have created scientifically correct, six-sided flakes.


window of snowflakes


We filled up this window, as well as another the same size. There were tons of tiny paper clippings all over the table and floor when we were finished! Once we had it all cleaned up, this project took up a whole afternoon - yay!

Final tip: iron the opened up flakes on a low setting to flatten them out before hanging.

Have fun!

Tuesday, September 27, 2011

pleased with the initial results

Before school started, we decided to rearrange the girls' room, putting both beds together against one wall. As soon as we had everything arranged, I realized we needed some sort of coordinating art over the beds to bring it all together. Nicole suggested something with their initials, at which point I knew exactly what I wanted to do...


IMG_4277a


How I did it...

The frames are from IKEA... one can of white spray paint later, and we were on our way!

I used a rotary cutter w/ mat and the cardboard insert from the frame as my guide to cut the background fabric which came from my stash.

Putting the glass back in the frame after painting proved to be the most difficult part of the job. Who knew fitting an oval piece of glass into an oval frame had to be exactly right or it wouldn't work? I cut my finger, so be careful!

The letters were the most complicated part. There may have been an easier way to do this, but I had to use the resources available to me, so here's what I did:
- I typed the letter into Word with the Parisian font (free download available here)
- changed the page layout to .5" on all sides, with 11x14 paper size
- changed the font size to 800 for the letter "N"
- changed the font size to 1000 for the letter "c" (I used the lower case "c" in this font because I liked how it looked better than the capital option, but this made it smaller than the capital "N" so I had to compensate by using a larger font size)
- held a piece of regular 8.5x11" typing paper up to my screen and gently traced a letter onto it with a pencil, then repeated with a new piece of paper for the other letter
- cut each letter out as cleanly as possible with sharp scissors
- turned each letter upside down on white cardstock, and lightly traced it (upside down so that trace marks won't be visible on the right side of the letter when finished)
- carefully cut out the cardstock letters - done!

I attached the fabric to the cardboard insert, and then the letter to the fabric, using (gasp!) a glue stick. It worked, didn't make anything pucker, and allowed for easy repositioning. Then I put them in the frames, hung them, and called the girls to come see.


IMG_4276a


IMG_4275a


The squeals I received were worth the bandaided finger...

Monday, September 26, 2011

swinging along

Another great Itty Bitty Baby Dress from the pattern by MadeByRae...


for Jill's new baby girl


This one is for my friend Jill, who, after 3 boys, is now blessed with a little girl as well.

Saturday, August 13, 2011

fan baby

Despite my ability to create all manner of beautiful girlie things, my family keeps insisting on giving birth to boys. I am about to be blessed with my second nephew, and was once again inclined to step out of my usual comfort zone to find something I could make that would suit a boy (because dads just don't like ruffles on their boys, who knew?)

Thankfully, my sister is a Dallas Cowboys fan, which I threw together with my crochet-abilities, and this is what I came up with:


Touchdown! (sorry, couldn't resist!)

Tuesday, June 14, 2011

{ upcycled skirt tutorial }

Does it break your heart when you get small holes or stains on your favorite tees?

Or when your daughter gets a big hole in her jeans - the unfashionable, not-distressed-but-just-plain-ugly kind of hole?

My heart breaks, too.

But I came up with a fun way to upcycle these items into one wearable, unique garment, and the following tutorial is for those of you who would like to try it for yourselves!


1. Prepare the jeans. Cut the legs off of the jeans, and cut an even line across from hip to hip. Try to lay the waistline the way it would naturally fall before you cut, with the front a bit lower than the back.

step one

The spot at the bottom of the center seams in front and back will probably look a bit warpy, due to the way the legs of jeans are cut, but don't worry, it will work out later.

Have your daughter try on the top of the jeans, and measure from the bottom cut edge to where you want the skirt to fall. Add 1" to this measurement for seam & hem allowances. This will be your cutting measurement for the next step. (I came up with 15" for this measurement for my 11 yr. old)


2. Prepare the tees. Pick out a few tees with colors that work together. Depending on the size skirt you are making, you may be able to make one skirt from just two or three good size tees. (By using about 7 tees, I was able to make 3 different skirts at once.)

Cut off the bottom band from the shirt, and then cut strips 4" wide going up the shirt until you reach an unusable portion. Using a rotary cutter and mat is the cleanest, easiest way to do this.

cutting

If you want to cut out stains or holes, you can strategically cut your strips around these unwanted places. I also made use of the usable back portion of tees that had button down collars or emblems in the front, by cutting the backs into additional strips.

Take the newly cut strips, and cut them into the predetermined length you found in Step 1 (in my case, for this example, 15" strips). If the shirt had side seams, cut around them.

Arrange the strips in the order you think you'd like them to be sewn together around the skirt, rearranging as necessary till you like the order they're in.

3. Start sewing. Sew the strips together using one of two techniques:
a. wrong sides together, use the rolled hem function on a serger, stretching as much as you can as you go, to create a lettuce edge as you attach the two strips together. (this may take a practice swatch to get the hang of - use some of your leftover tee scraps to get it worked out before you start.)
b. right sides together, serging or using a regular sewing machine with a stretch stitch to attach the two strips together - this will yield a different look, with more clean seams that will be hidden inside the garment, if that's what you prefer

When you have used up all of your strips sewing them together, you'll have one big rectangle of vertical strips sewn together at their sides. Finish it off by hemming it as desired (rolled hem w/ lettuce edge, serge & stitch, or a zig-zag w/ standard sewing machine), and then attaching the edges of the end strips to each other to create a tube out of the rectangle.

step 3

(This example was an experiment, with seams facing outward, sewn using a rolled hem on a serger but without lettuce edge stretching.)


4. Attach the skirt to the jeans. Turn the skirt tube inside-out, to be able to put it right side against the right side of the jeans. Place the raw edges of the skirt's top edge and the jeans bottom edge against each other, and pin all the way around.

I needed to pleat the skirt a bit where each group of two skirt strips met, all the way around, to ease the fullness of the skirt to the jeans - this actually is cute, and adds a bit of flare to the skirt portion when it's finished.

Sew with a straight stitch on a regular sewing machine, giving a 1/2" seam allowance. Serge (or overedge) to finish the seam. Turn the whole thing right side out, and topstitch the skirt down with the seam turned up toward the jeans.


Voila'!


upcycled skirt from jeans & tees


(I have assumed that those trying this tutorial have a basic understanding of sewing directions. If you need further help, feel free to contact me!)


UPDATE: I'm so excited to have Craft Gossip include this tutorial on their site!

Saturday, January 29, 2011

:: pink ::

just a little something I made last weekend for a baby shower:


sweet baby girl

Monday, January 10, 2011

snow day

snow!


snowy lavender

snowy lavender

-::- -::- -::- -::- -::- -::- -::-


wintry weather was the perfect excuse to work on a crafty project I had been hoping to do soon:


wreath project


how to make a fabric rag wreath:

wire heart wreath form from Hobby Lobby - $1.69

various fabrics I had on hand in shades of white & off white, torn into 1" wide strips (about 30-40 selvage-to-selvage strips) & cut to 6" lengths

spent a whole movie tying the strips to the wreath form last night - done!

Wednesday, August 11, 2010

dinner and a dress

for dinner:


pecan crusted mozzarella salad


pecan crusted mozzarella salad

dredge whole milk mozzarella cheese rounds in flour, then egg, then a mixture of finely chopped pecans/parmesan cheese/breadcrumbs

fry in 1 tbsp olive oil for 2 min. each side

serve over spinach or salad greens with lots of chopped basil, tomatoes, and italian or vinagrette dressing


~.*.~.*.~.*.~.*.~.*.~.*.~.*.~.*.~.*.~.*.~


for cloee


I also made this dress yesterday for baby Cloee, using the Itty Bitty Baby Dress from MadebyRae again. This is a great pattern for using up small bits of fabric for a lovely baby gift.

Monday, June 21, 2010

inspired by nature

captured in design by a ten year old:

inspired by nature


"My Summer Dress
w/ me in it"

Friday, April 30, 2010

:: window flowers ::

window flowers


I got the idea for these flowers from my obsession with cutting out paper snowflakes at Christmas...

I used this as a homeschool art project and lesson in symmetry for a fun spring homeschool project the girls. Lots of colored paper bits were flying!

The tulips and lilies were done by just folding the paper in half and opening them back up after cutting.

The daisies were done like a paper snowflake, without the detailed cutouts that would make it a snowflake.

Bits of folded over tape hold the stems to the flower, and to the window at the same time.


window flowers

Sunday, February 28, 2010

Sophia's baptism gown

When my friend Melissa asked me to make the gown for her newborn daughter's baptism this coming March, I was honored. I didn't know much about heirloom sewing back when my own girls were little, so I sadly did not make such precious things for them... therefore I consider it a truly special task to create these things for others close to me.

Melissa had a few special requests - box pleats, clean lines, and white silk. I took her desire for simplicity, and hopefully created a treasure for this special day for both the beautiful baby girl, Sophia, and her family.


christening/baptism gown


Designs for hand-embroidered crosses were practically non-existent on the internet and in my many back issues of Sew Beautiful magazine, so I designed this one myself.

bonnet and dress


Five rows of pintucks... three delicate hand embroidered arcs and french knot trios to symbolize the Trinity... I also added baby's initials & year of baptism...

dress skirt


I greatly modified the ideas behind an Ayrshire bonnet pattern from Sew Beautiful magazine Issue #79 for this bonnet - just a bit of flat lace, pintucks, and delicate crocheted edging...

bonnet


I decided on the use of pleats to gather the crown, which kept with the design of the dress... I found this was actually easier than gathering, and the results are, in my opinion, quite lovely.

bonnet back

Saturday, February 20, 2010

freebies for you!

I'm not a scrapbooker, but because I enjoy other hobbies that involve paper and such, I have ended up with a bunch of products that are directly related to scrapbooking.

I just cleared out my hobby box, and came up with a little stash of things that I have never used for my hobbies, but surely could be put to good use by a scrapbooker out there...

Creative Memories fall stickers, CM precut paper pieces in 6 colors, rub-on transfers, Coluzzle knife & replacement blade, puffy heart alphabet lettered stickers, a sheet of CM ivory alphabet stickers, a package of CM photo backing papers for up to 4x6 photos.


So if you are a scrapbooker, you are welcome to this little package of goodies - just be the first commenter saying you want them, and they're yours! Consider it my "thank you" for helping me clear out some things I don't need. Oh, be sure to leave your email in your comment so I can get you mailing address from you.

Monday, February 8, 2010

recent projects

I've been keeping busy through this wet winter weather with various projects... I even painted a few walls today, but pictures of that will have to wait until later.


another Itty Bitty Baby Dress, this time for Leslie's girl due 2/11...

Leslie's baby dress


I am working on a baptism gown for Sophia - this will be the front bodice piece. I designed this cross because I could not find a hand embroidery design anything like this.

hand embroidered cross design


And finally, this little top is newly listed in my etsy shop: